 EU: Free Shipping starting from €60
 Great customer care

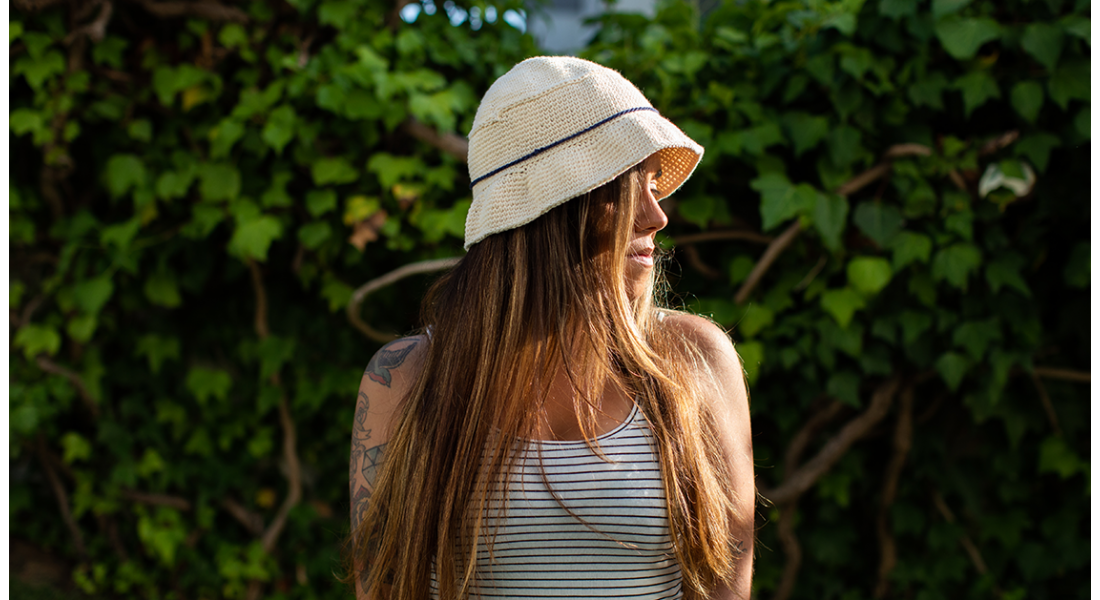
If you’ve been searching for a bucket hat crochet pattern, this is your sign to start. This free crochet bucket hat pattern is a fun, practical project that quickly turns into your new favourite hat for summer. Lotte from @lotsontheway made a free crochet pattern for all ages!
This guide shows you how to crochet a bucket hat step by step, using simple stitches and a shape that actually makes sense as you go. Whether you’re looking for a crochet bucket hat pattern free to try for the first time or just want a relaxing weekend make, this one fits the bill.
It’s easy to customise, fun to wear, and works with different yarns and colours depending on your style. Oh, and don't forget to share your crochet bucket hat on Instagram and TikTok by tagging us (@hoooked.zpagetti).
Skill level: Beginner to intermediate
Time to make: Approx. 3-6 hours
What You’ll Need
- 1x 100g of your favourite light yarn (for a size S/M Woman (up to 200g for size men s/m)
- Crochet hook 4 mm (or another hook size that fits the yarn you picked)
- Stitch marker
- Scissors
- Tapestry needle
Stitches Used (UK Crochet Terms)
- Chain (Ch)
- Slip Stitch (Slst)
- Double Crochet (dc) (= single crochet (sc) in US terms)
- Increase (2 dc in the same stitch) (= 2 sc in the same stitch in US terms)
You'll also work some stitches in the back loop only (BLO) and sometimes between stitches, so keep an eye on where your hook goes.
If you don’t already use a stitch marker… start now. It will save you from that “wait, where am I?” moment halfway through
Sizes
Measure the head size by wrapping a measuring tape around the head. Follow the pattern until you reach the desired size.
In crochet, size is flexible: If your hat turns out slightly bigger or smaller, that’s normal. Tension and yarn choice always play a role, and small adjustments are part of the process.
|
Baby |
37-43 cm/14,5”-16,9” | diameter approx. 12,7 cm/5,0” |
|
Toddler |
49-52 cm/19,3”-20,5” | diameter approx. 16,0 cm/6,3” |
|
Child |
52-54 cm/20,5”-21,3” | diameter approx. 17,0 cm/6,7” |
|
Teenager |
52-55 cm/20,5”-21,6” | diameter approx. 17,5 cm/6,9” |
|
Woman S/M |
55-57 cm/21,6”-22,4” | diameter approx. 18,0 cm/7,0” |
|
Men S/M |
57-60 cm/22,4”-23,6” | diameter approx. 18,5 cm/7,3” |
Pattern
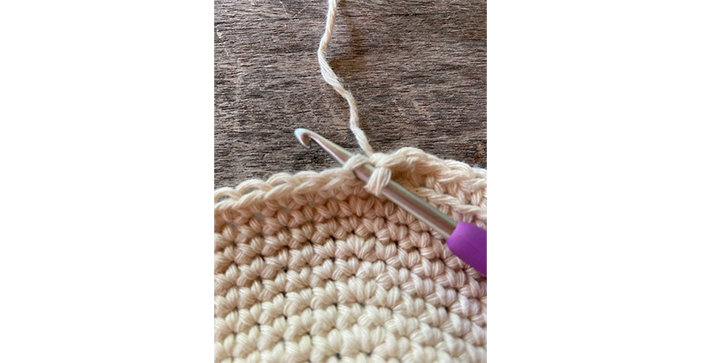
Step 1: Top of the hat
Start with a magic ring.
R1: Work 6 double crochets into the ring.
R2: Increase in every stitch (2 sc in each stitch). (Total of 12 stitches)
R3: [1 dc, 1 increase]. Mark the first stitch with a stitch marker, this way you'll know where the round begins. Repeat [...] around. (Total of 18 stitches)
R4: [2 dc, 1 increase]. Mark the first stitch with a stitch marker, this way you'll know where the round begins. Repeat [...] around. (Total of 24 stitches)
R5: [3 dc, 1 increase]. Mark the first stitch with a stitch marker, this way you'll know where the round begins. Repeat [...] around. (Total of 30 stitches)
What's happening here: You’re building a flat circle. If it starts to curl, you may need more increases. If it ruffles, you may have too many. Always mark the first stitch of every round - this way you'll always know where the round begins. Between (...) is the total stitches count in each round.
Always mark the first stitch of every round - this way you'll always know where the round begins.
R6: 2 dc, 1 increase, [4 dc, 1 increase]. Repeat [...] around. End the row with 2 dc. (36)
R7: [5 dc, 1 increase] Repeat [...] around. (42)
R8: 3 dc, 1 increase, [6 dc, 1 increase]. Repeat [...] around, end the row with 3 dc. (48)
R9: [7 dc, 1 increase]. Repeat [...] around. (54)
R10: 4 dc, 1 increase, [8 dc, 1 increase]. Repeat [...] around, end the row with 4 dc. (60)
R11: [9 dc, 1 increase]. Repeat [...] around. (66)
R12: 5 dc, 1 increase. [10 dc, 1 increase]. Repeat [...] around, end the row with 5 dc. (72)
R13: [11 dc, 1 increase]. Repeat [...] around. (78)
R14: 6 dc, 1 increase. [12 dc, 1 increase]. Repeat [...] around, end the row with 6 dc. (84)
R15: [13 dc, 1 increase]. Repeat [...] around. (90)
R16: 7 dc, 1 increase. [14 dc, 1 increase]. Repeat [...] around, end the row with 7 dc. (96)
R17: [15 dc, 1 increase]. Repeat [...] around. (102)
R18: 8 dc, 1 increase. [16 dc, 1 increase]. Repeat [...] around, end the row with 8 dc. (108)
R19: [17 dc, 1 increase]. Repeat [...] around. (114)
R20: 9 dc, 1 increase. [18 dc, 1 increase]. Repeat [...] around, end the row with 9 dc. (120)
R21: 19 dc, 1 increase]. Repeat [...] around. (126)
Make more rows if needed. Increase with 6 stitches in every new row.
Step 2: The sides
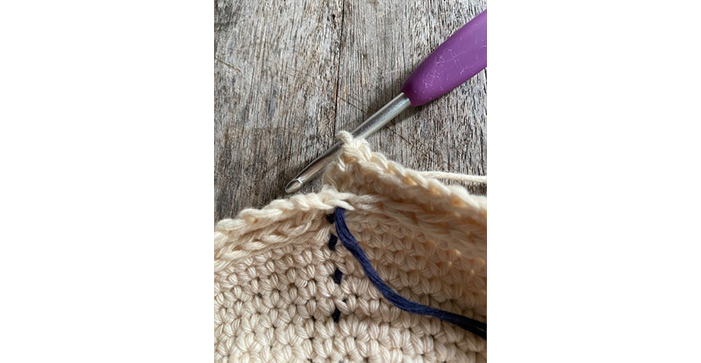
R22a: 1 dc back loop only in every stitch, ch 1, turn
R22b: Make a slip stitch between the dc stitches of row 22a (and mark it with a stitch marker), close the round with a slip stitch in the first slip stitch of this row, cha 1, turn.
R23: 1 dc in every stitch
There might be a small gap between the beginning and the end of round 23, just crochet on with the next round, pull the yarn tight and the gap will close.
R24-36: 1 dc in every stitch
Make more or less rounds if you would like to make the side bigger or smaller. End the side with the pattern instructions of round 37.
R37: 1 dc in back loop only in every stitch.
This is where it starts looking like a hat: It goes from “mysterious circle” to “okay, I see it now” pretty quickly.
Step 3: The brim
Now we shape the brim. Start increasing again, but more gradually than before.
R38: [4 dc, 1 increase], repeat [...], dc in the remaining stitches.
If you prefer a less wavy brim, do not increase in R39, instead dc in every stitch.
R39: [4 dc, 1 increase], repeat [...], dc in the remaining stitches.
Follow the pattern until you've reached the desired size. Make more or less dc rounds, if you like a bigger or smaller brim. End the brim with the pattern instructions of R48.
Tip: A wider brim gives more shade. A shorter brim keeps the look minimal.
R40-47: 1 dc in every stitch
R48: Slip stitch in every stitch. Fasten off and weave in all ends.
Variations
- Use different colours or stripes
- Try Soft Cotton DK, or other light yarn, for a softer, lighter feel
- Adjust brim width for different styles
Same pattern, completely different look depending on your yarn choice.
Troubleshooting
- Hat too large → reduce increase rounds>
- Hat too small → add an increase round
- Brim too wavy → reduce increases
- Structure too stiff or too soft → adjust hook size or yarn
If something looks slightly off, adjust as you go. That’s part of crochet.
If something looks slightly off, adjust as you go. That’s part of crochet.
Final Thoughts
This is a straightforward project with a really satisfying result. Once you’ve made one, it’s easy to experiment with colours, sizing, and yarns to make it your own. Share your projects with us, using #GetHoooked and tagging us on social media @ hoooked.zpagetti


