 EU: Free Shipping starting from €60
 Great customer care

How to Read a Pattern: Easy Beginner Crochet Bag (Step-by-Step Guide)
If you’ve been searching for beginner crochet projects or figuring out how to crochet a bag, this is a great place to start.
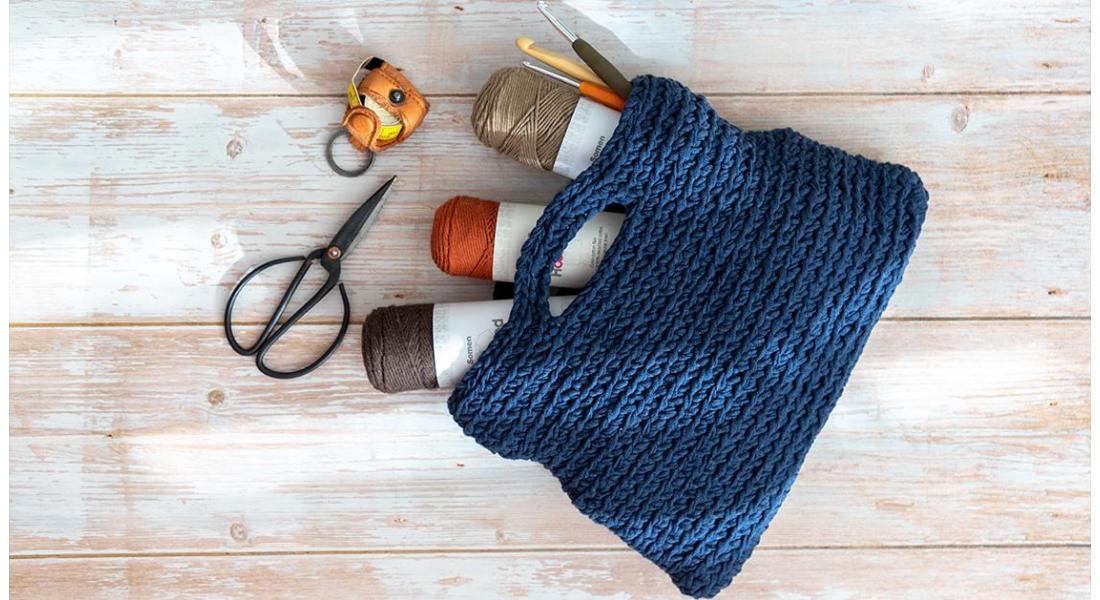
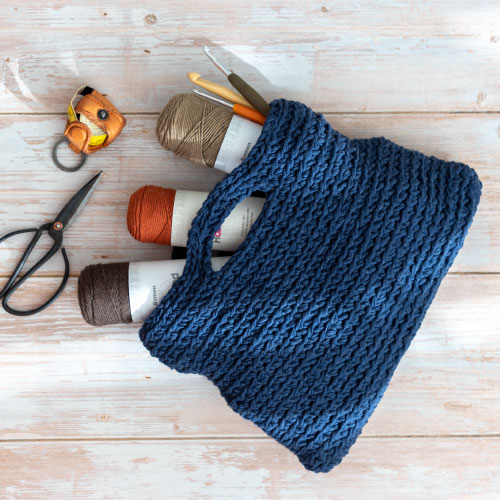
Meet the Ventimiglia Bag. It’s the very first pattern Hoooked ever made, inspired by a train ride from Den Haag all the way down to the south of France. Not a bad origin story for a bag, right? It’s simple, practical, and ideal if you’re learning crochet for beginners. No tricky stitches, no complicated construction, just a few basics repeated in a smart way.
By the end, you’ll not only have a bag, you’ll actually understand what you’re doing. Which is the whole point.
What You’ll Need
- 1 x 250g RibbonXL (in this pattern we used Riverside Blue or Spicy Ocre, but feel free to choose any shade you like)
- 8 mm crochet hook (UK size 0 / US L-11)
- Scissors
- Yarn needle
Finished size: approx. 28 x 22 cm (11 x 9 inches)
Stitches Used (UK Terms)
We’re keeping this very beginner-friendly:
- Slip knot
- Chain (ch)
- Double crochet (dc)
- Slip stitch (sl st)
If you’re learning easy beginner crochet, this is exactly the level you want.
UK vs US Crochet Terms (Quick Reality Check)
This trips up a lot of beginners.
- UK double crochet (dc) = US single crochet (sc)
- UK patterns use different names for the same stitches
So if something ever looks “wrong”, it’s probably just a terminology mix-up, not you. Hoooked patterns use UK terms.
How to Read a Crochet Pattern
If patterns feel confusing, you’re not alone. Here’s what actually matters when you read one:
1. Look at the stitches first
Ignore everything else for a second. Can you do the stitches listed? If yes, you’re already halfway there.
2. Spot the repeats
Most patterns are just the same thing over and over. In this bag, it’s mostly: 1 dc in each stitch. That’s it.
3. Watch for shaping words
These are the only bits that really change things:
- Increase = more stitches in one spot
- Decrease = fewer stitches (usually by combining stitches)
These control the shape of your project.
4. Pay attention to structure, not just steps
Ask yourself: Am I working in rows or rounds? Am I turning, or going in a spiral? For this bag, you’re working in a continuous spiral, which means no joining rounds.
5. Don’t expect it to make sense immediately
Patterns often click after a few rows. That’s normal.
Ventimiglia Bag: the Crochet Pattern
Step 1: Crochet the Base
Start with a slip knot.
Chain 26 (about 25 cm).
Now:
- Work 1 dc in each chain, starting from the second chain from your hook
- When you reach the last chain, crochet 3 dc in that stitch
This turns your work so you can go around the other side.
- Continue with 1 dc along the other side
- Finish with 3 dc in the first chain
You now have an oval. That’s your base.
Step 2: Build the Sides
Now we go up.
From here on:
- Crochet 1 dc in each stitch, continuously (spiral)
- No closing rounds
Keep going until your bag is about 18 cm tall (around 16 rounds).
Optional: Add a Waist
If you want a bit of shape:
- Around round 10: decrease a couple of stitches on each side
- A few rounds later: increase them again
This creates a slight curve in the bag. If that sounds like too much for now, skip it. Straight works perfectly.
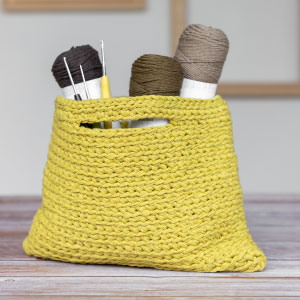
Step 3: Make the Handles
Find the centre of the front.
Then:
- Crochet 8 dc
- Chain 10
- Skip 10 stitches
- Crochet 8 dc
Repeat on the back. You’re creating space by replacing stitches with chains. That space becomes your handles.
Step 4: Finish it Off
- Crochet 1 round of dc
- Then 1 round of slip stitches
This neatens the edge and gives the bag structure. Fasten off and weave in your ends.
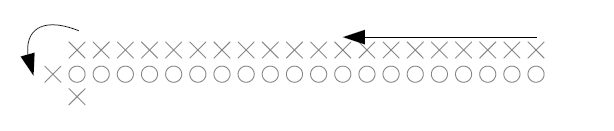
How to Read the Diagram (without overthinking it)
If you’re looking at a crochet diagram:
O = chain stitch
X = double crochet
The long oval shape you see? That’s exactly what you just made:
- Straight sides = 1 dc in each stitch
- Rounded ends = multiple stitches in one spot (your 3 dc)
Think of it like drawing an oval by hand. Straight… curve… straight… curve.
That’s your first Crochet Bag done!
If you’ve been looking for a crochet bag pattern or wondering how to crochet a bag, this is one of the easiest ways to start.
You’ve learned how to:
- Work around a chain
- Crochet in the round (spiral)
- Shape a project
- Read both written patterns and diagrams
And once that clicks, you’re no longer just following instructions. You actually get it.


