 EU: Free Shipping starting from €60
 Great customer care

Tapestry crochet is a wonderful trick to pick up once you have covered your crochet basics. The tapestry crochet technique opens up endless possibilities for colour variations. You can make the craziest colour combinations! A tapestry creation is extra thick and sturdy so ideal for home accessories, such as baskets, pillows and rugs. Tapestry crochet is not difficult at all. With our tutorial you will be able to get started right away. You will learn the techniques and at the same time make your own herringbone tapestry crochet cushion cover!
Tapestry crochet tutorial
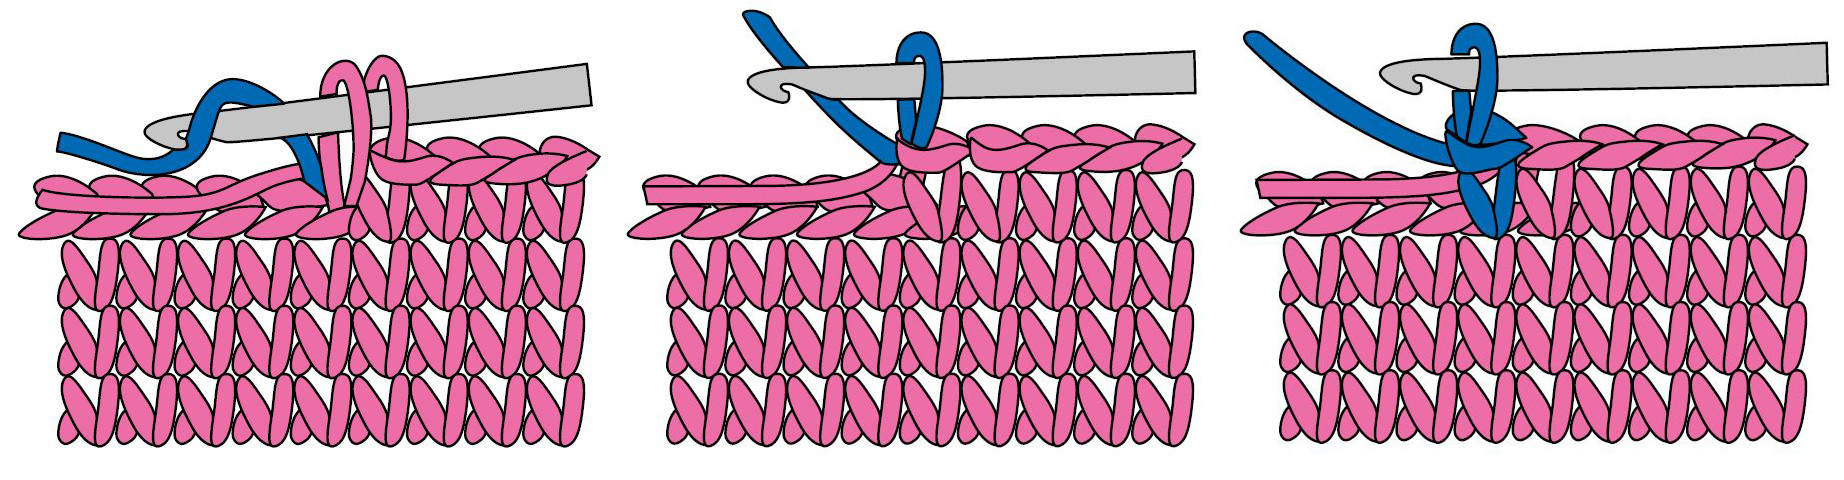
Using this technique you can create an invisible colour change carrying and crocheting around the yarn you’re not currently using. The yarn moves along with you until you switch colours again. You then change colours and start working your stitches over the yarn you’re no longer using.
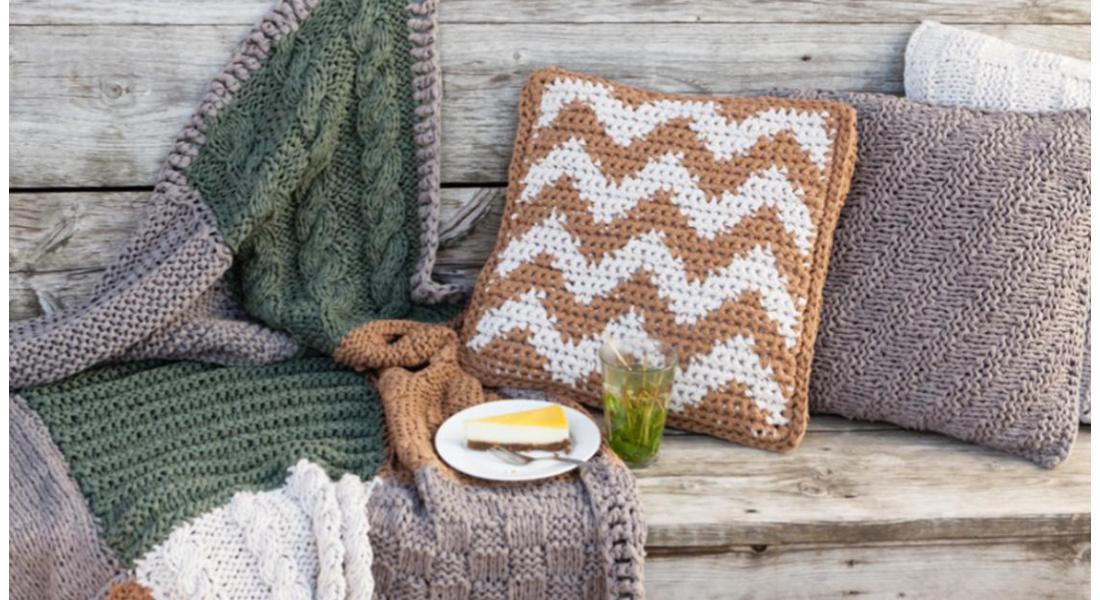
Free tapestry crochet pattern: herringbone cushion
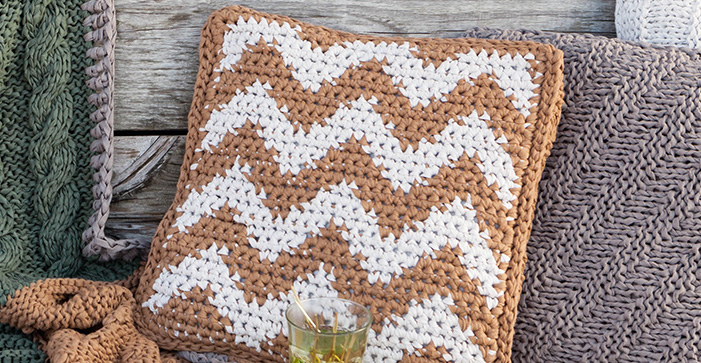
We designed this fun cushion cover with a two-colour herringbone so it really pops out when you add it to a background of other cushions.
What you need:
- Bobbin RibbonXL Sandy Ecru
- Bobbin RibbonXL Caramel Brown
- Bobbin RibbonXL for the back side
- Crochet hook 10 mm
- Cushion insert (40 x 40 cm)
Step 1. Master the tapestry crochet technique using a diagram
Read the diagram as follows:
- Each block is a stitch
- Read from bottom to top
- Read the first row from left to right and the second tour from right to left
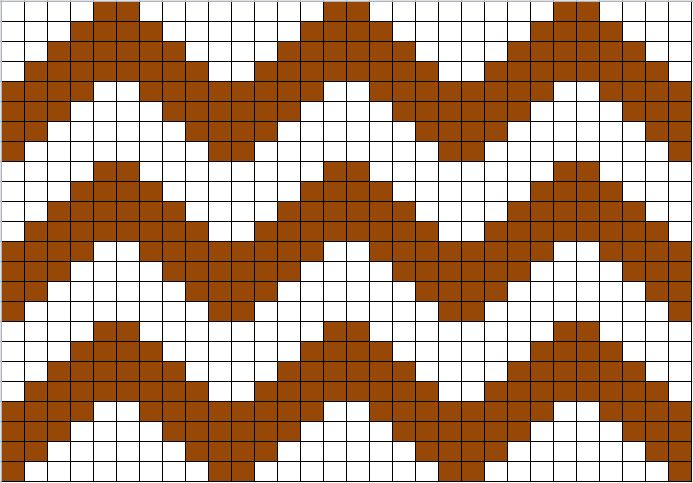
Start with ecru and chain 30 (turn and chain 1) and crochet 1 dc in every stitch alternating colours brown and beige according to the tapestry crochet diagram. Each row has 30 stitches and the cushion is completed after 24 rows.
Never crocheted with a diagram before? Here’s your chance to get the hang of it. Below we have written out the complete first two rows of the diagram. Once you have crocheted these and checked them with the diagram, you have mastered the tapestry technique! The rest of the rows will be a piece of cake.
Chain 30, turning chain.
R1: Crochet 1 dc in every stitch, change colour to brown in the 4th stitch, then change back to ecru in the 6th stitch, change back to brown in the 14th stitch, change back into ecru in the 16th stitch, change back into brown in the 24th stitch, then change back into ecru in the 26th stitch, crochet until the end of the row and turn for the next row (keep using brown). Now read the 2nd line of the diagram from right to left.
R2: Crochet 1 dc in every stitch, change colour into brown in the 3rd stitch, change back into ecru in the 7th stitch, then change back into brown in the 13th stitch, change back into ecru in the 17th stitch, change back into ecru in the 23rd stitch, change back into ecru in the 27th stitch, crochet until the end of the row and turn for the next row (stay with brown). Now read the 3rd line of the crochet diagram from left to right.
Step 2: Continue with tapestry and finish the front side
Follow the colour variations of the crochet diagram and complete this cushion with 24 rows. Crochet around the crochet work in dc to make a perfectly smooth lining. Make sure to increase 2 stitches in every corner stitch to make a perfect square. Fasten off and work away any loose ends by weaving them through the “wrong” side of the crochet work.
The dimension of the finished crochet work should be about 40 cm x 40 cm. For the back side crochet a piece of approx. 40 x 40 cm. Start with a chain 30, turn and crochet in dc or any stitch you like until a height of 40 cm. Join both sides and work away any loose ends.
Tip: Not so tight! New crocheters tend to pull each stitch either too tightly, forcing all of the stitches to move out of alignment when changing to a new colour, or work too loosely, and that creates horrible gaps!You don’t want either so you may have to practice a few times to get it right. Don’t give up though!
More patterns
Want a rug to match your new cushion? Take a look at our knitting patterns. The knitted taupe cushion is also very easy to make with our DIY knitting kit. You can shop the knitting kit for the cushion through the button below!


